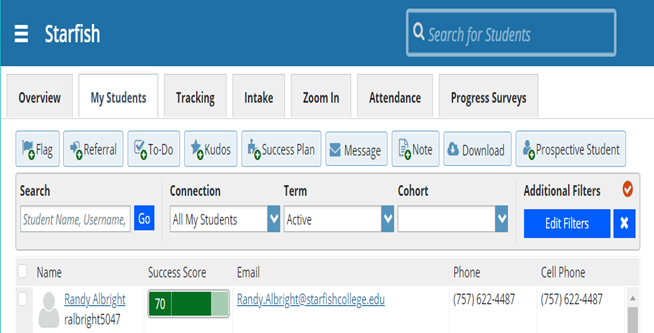
3. Click on the student’s name to bring up the Student Folder.

4. Click the Flag button. A list of flags that you can raise on this student is displayed.
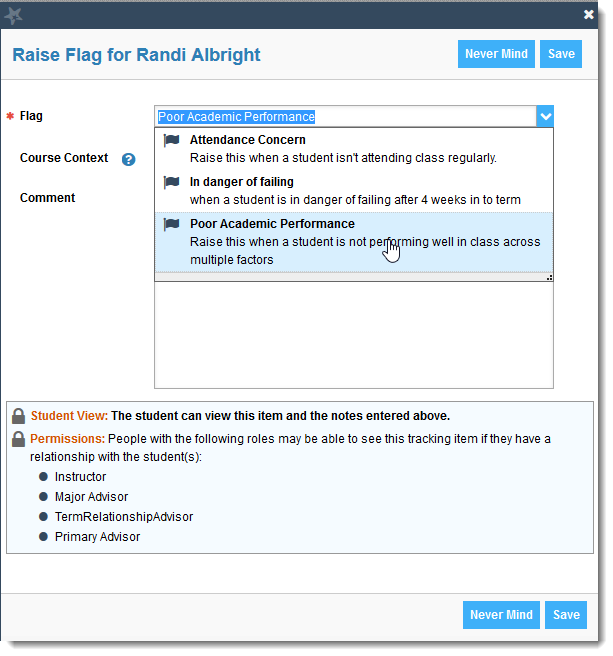
5. Select the desired Flag from the list.
6. If relevant, select a course from the Course Context drop down list, and enter notes in the
Comment box.
7. Click the Save button.
respond to a Progress Survey
1. Select the progress survey link on your Starfish Home page to go the Progress Surveys tab. (Only
visible when you have active surveys.)
The selected survey opens, listing your students on the left, and items you may raise across the top.
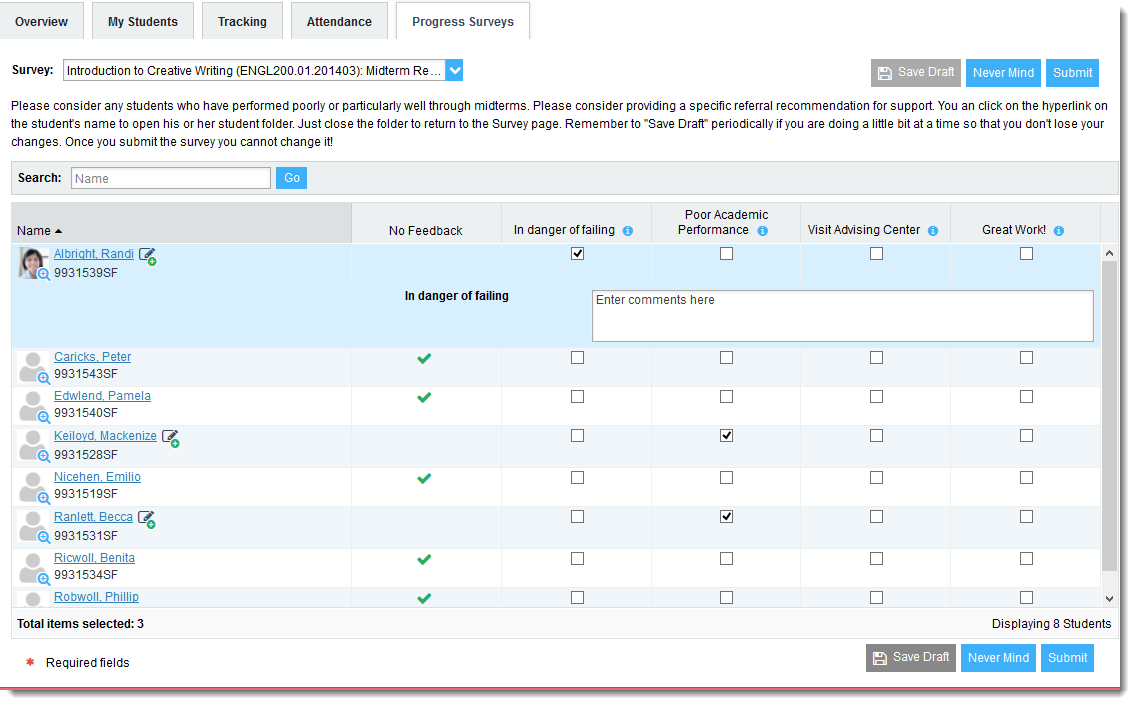
2. Check the box for each desired item/ student combination.
3. Click the comments icon ( ) to open a text box for your notes.
Click the information icon ( ) associated with an item to verify whether or not the student can
view the flag and related comments.

4. Click the Submit button only when you are finished providing feedback. The items you selected
will be raised on your students when you submit the survey.
IMPORTANT: Once you have submitted the survey, you will not have an opportunity to add to or undo the items you raised. Use the Save Draft option if you are not ready to submit your survey.
You may be asked to submit more than one course survey if more than one of your courses has been included in the survey plan for your institution. They will be listed in the drop-down menu on the Progress Surveys tab.
Notes:
You may find the following YouTube Two Minute Tips helpful:
- Update Your ACHIEVE Profile
- Update How You Are Emailed About Flags
- Update How You Are Notified About Appointments
- Completing a Progress Survey
- How to Create Office Hours
Additional Resource:
Access ACHIEVE
Resources for Students
Resources for Faculty/Staff
News
FAQ
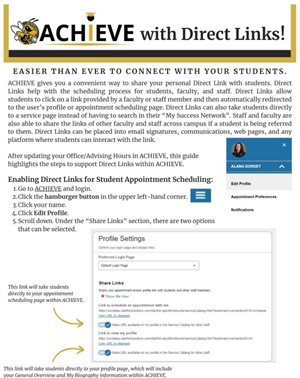
Check out the January 2022 issue
Welcome to ACHIEVE!
ACHIEVE gives you a convenient way to keep track of your students – raising flags when you see a pattern of behavior that concerns you, ensuring that the people on campus who can intervene are aware. It also allows your students to easily book an appoinment with you or someone else who can help.
Getting started is easy! Accessible through MyState, ACHIEVE will automatically display all students that you have been assigned or are enrolled in your courses.
The first thing you will want to do is setup your profile. Some of your information has already been imported from Banner, but you have the option to update and further personalize your profile.
*Please note that you will see the name “Starfish” used on the graphics below. We have rebranded this tool on our campus to ACHIEVE.
Here is an example of what your ACHIEVE profile will look like: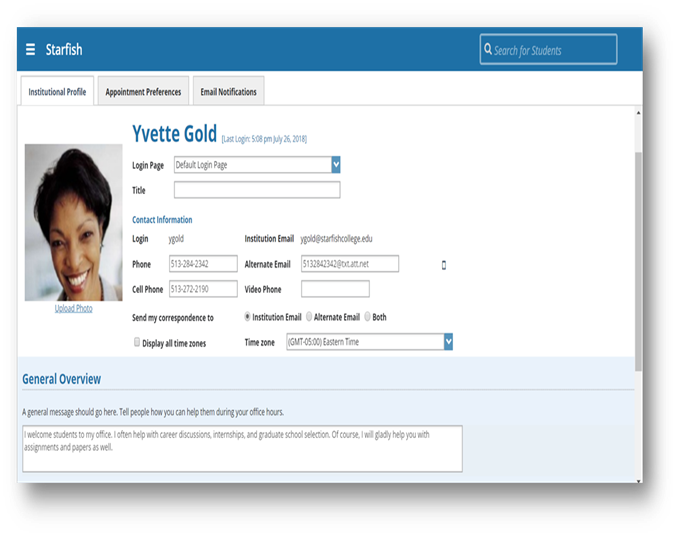
Students will be more likely to reach out if they know a little about you. Be sure to write a short blurb about yourself in your General Overview.
Next, you will need to set up your Appointment Preferences. This is where you will establish your appointment preferences, location, and calendar managers. This information must be set up in order for you to make appointments using ACHIEVE.
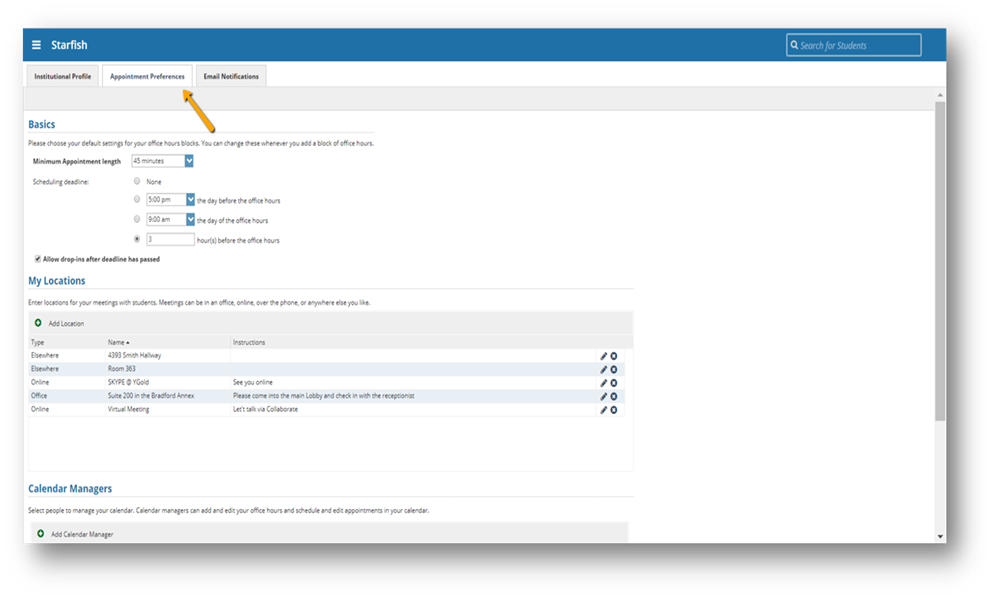
The Email Notifications tab within the profile allows you to set preferences for receiving appointment notifications as well as tracking item notifications (summary emails).
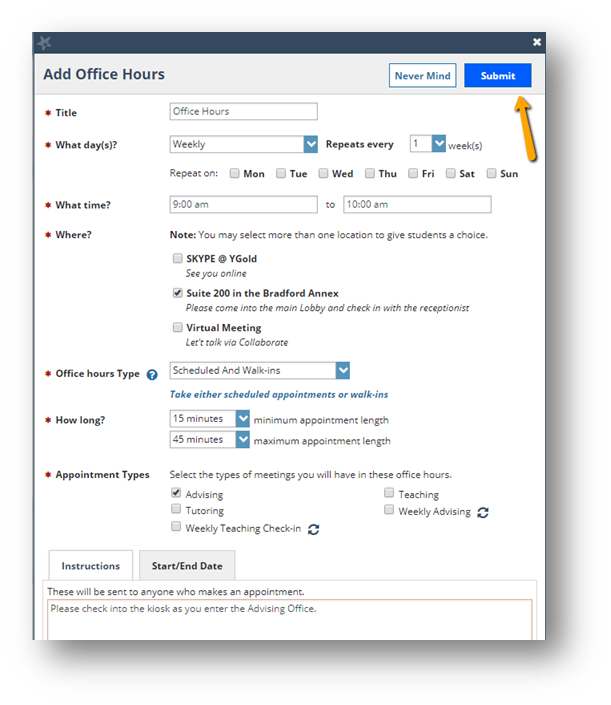
Complete the Add Office Hours wizard to indicate availability, location, and type of appointment; then click submit.
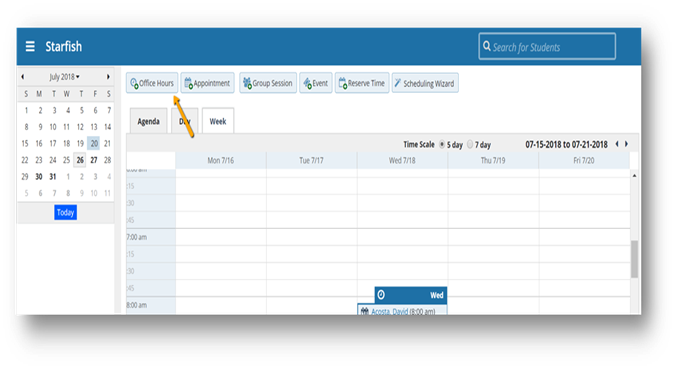
You can easily capture your appointment/meeting outcomes by selecting Outcomes and clicking on Speednotes.
Raise a flag
When you have a concern with a particular student, raise a flag, to-do, or referral to communicate your observations. The appropriate individuals will be automatically notified when you save the item.
1. Click on the Students navigation item to see your list of students.
2. Find the desired student by typing the name into the Search box.
